We will use Handbrake to save DVD videos on an external hard disk. A smart TV can play the videos when the hard disk is connected via the USB port. A word of caution - only output to mp4 format. TVs usually do not support many formats but most of them support mp4. Here is the procedure to rip the DVD videos.
1. Insert DVD
2. Open Handbrake and Select "Source"
 

3. Select the DVD disc
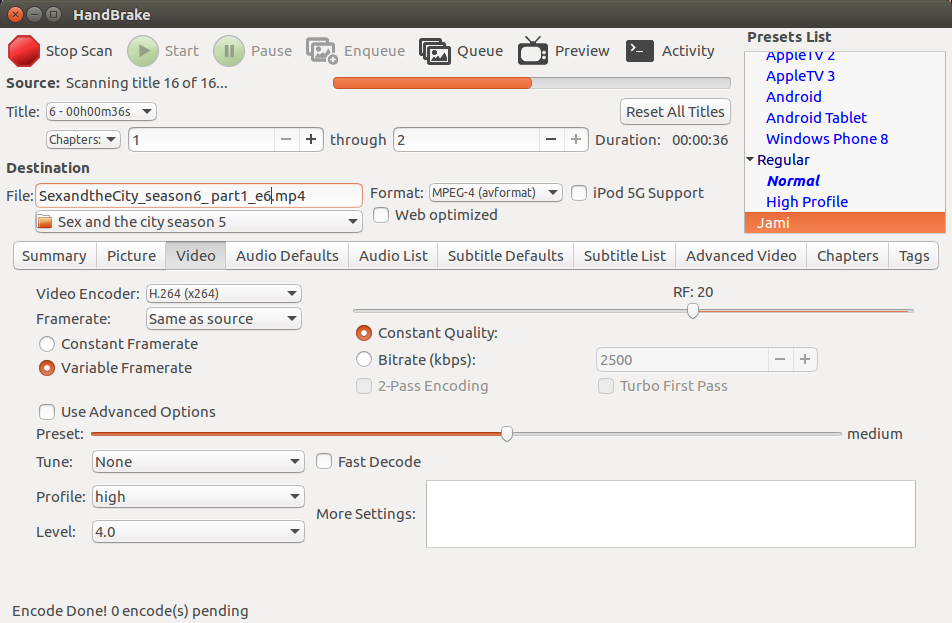
Handbrake will start analyzing the DVD file for video content. If it doesn't’ (sometimes it takes a few tries) then repeat above step and select the DVD drive as source again. It will look like this while it is scanning

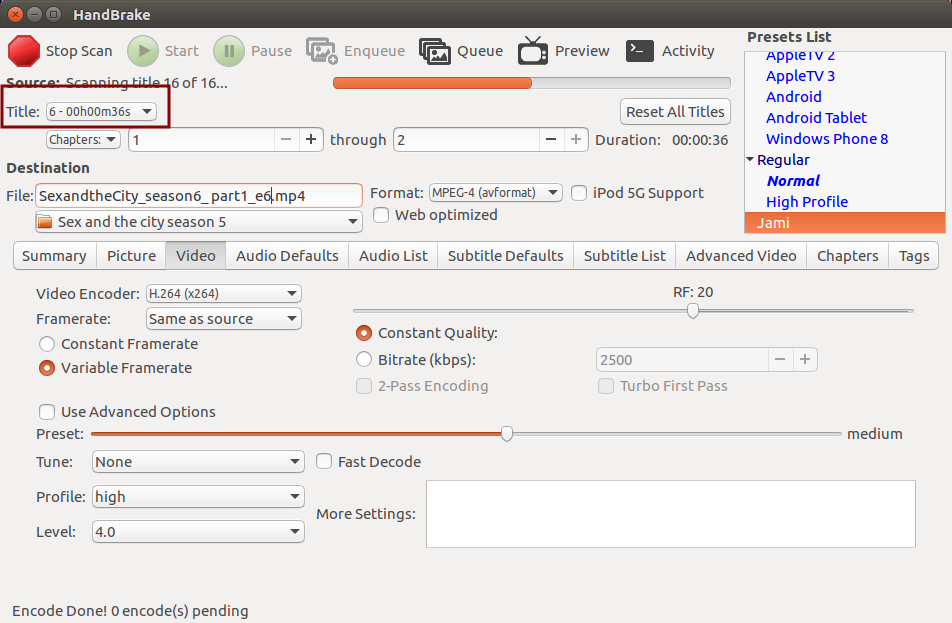
Once it is done scanning we will begin the process of extracting the videos (titles). Now this DVD has 6 episodes. We will select each track, apply a video profile to it, and then enqueue it to the encoding queue. The video profile selects the encoding parameters which produce the optimal video file of the smallest size without compromising on the quality.
When extracting from a DVD, I like to keep everything at the default high profile with only a few modifications of my own. Here’s how
4. Select the first title

5. Then select the “High profile”
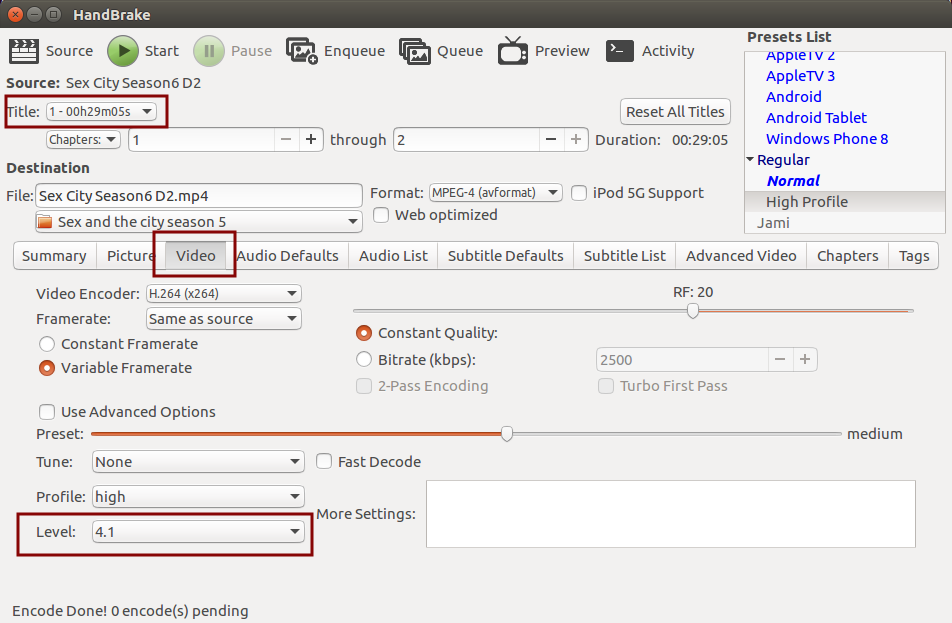
6. Go to “Video” tab

Change Level from 4.1 -> 4.0 since many smart TVs still cannot read the 4.0 H.264 format.
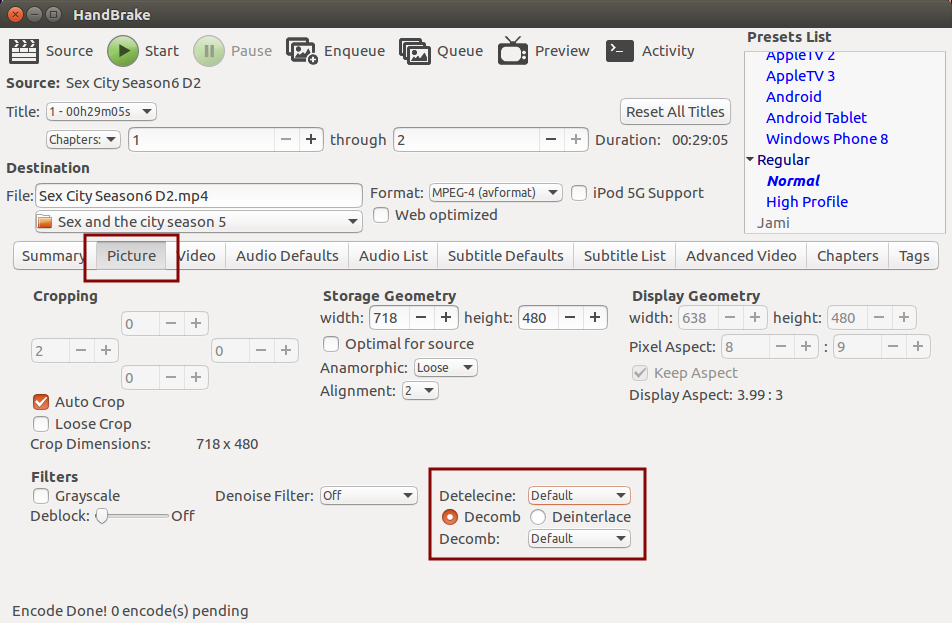
7. Go to “Picture” tab.

Set Detelecine and Decomb to Default - Hover your mouse over them to look at their description (the description is quite detailed). I like to keep them at default as most videos do not need deinterlacing anymore and forcing it can make the video choppy.
Autocrop - should be enabled by default but if you want to keep the letterboxing then uncheck it.
Now save this settings profile with any name. We will select this profile every time we encode the videos.
8. Give a descriptive name to the output file and select a destination.
9. Click Start. Handbrake will start processing in the background.
10. Select the second title and repeat the above steps. Only at the very end instead of clicking Start, use the Enqueue button.
11. Repeat for all episodes on the DVD.
References:
mattgadient.com/2013/06/12/a-best-settings-guide-for-handbrake-0-9-9
1. Insert DVD
2. Open Handbrake and Select "Source"
3. Select the DVD disc
Handbrake will start analyzing the DVD file for video content. If it doesn't’ (sometimes it takes a few tries) then repeat above step and select the DVD drive as source again. It will look like this while it is scanning

Once it is done scanning we will begin the process of extracting the videos (titles). Now this DVD has 6 episodes. We will select each track, apply a video profile to it, and then enqueue it to the encoding queue. The video profile selects the encoding parameters which produce the optimal video file of the smallest size without compromising on the quality.
When extracting from a DVD, I like to keep everything at the default high profile with only a few modifications of my own. Here’s how
4. Select the first title

5. Then select the “High profile”
6. Go to “Video” tab

Change Level from 4.1 -> 4.0 since many smart TVs still cannot read the 4.0 H.264 format.
7. Go to “Picture” tab.

Set Detelecine and Decomb to Default - Hover your mouse over them to look at their description (the description is quite detailed). I like to keep them at default as most videos do not need deinterlacing anymore and forcing it can make the video choppy.
Autocrop - should be enabled by default but if you want to keep the letterboxing then uncheck it.
Now save this settings profile with any name. We will select this profile every time we encode the videos.
8. Give a descriptive name to the output file and select a destination.
9. Click Start. Handbrake will start processing in the background.
10. Select the second title and repeat the above steps. Only at the very end instead of clicking Start, use the Enqueue button.
11. Repeat for all episodes on the DVD.
References:
mattgadient.com/2013/06/12/a-best-settings-guide-for-handbrake-0-9-9
Comments